
VR Lens World
We live in an age where almost everyone can take videos with their camera or smartphone. What if you were able to shoot 3D and 3D VR videos with the same casual ease? Well… now it is possible, thanks to Canon’s EOS VR SYSTEM. Today, anyone with a compatible camera can capture and generate 3D images with ease.
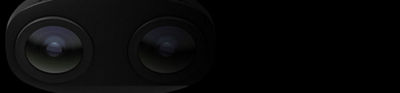
When you look at an object, your left eye sees it from a slightly different angle than your right eye. The brain can interpret the slight differences between the two images (parallax) to create a three-dimensional picture of the world.This is what allows us to judge distances, and to perceive objects in perspective. Canon’s VR lenses are positioned with nearly the same focal spacing between the two lenses as the left and right eyes of an average person. This creates a natural parallax that allows the camera to capture images with a three-dimensional effect. (Figure 1)

Figure 1
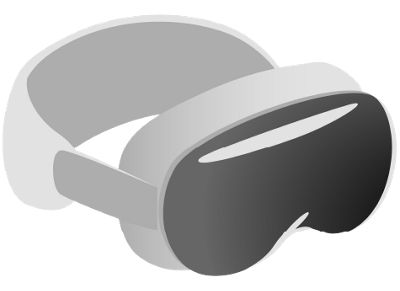
When the recorded image is viewed with VR goggles, the image for the left eye and the image for the right eye appear respectively on the left and right screens of the goggles. The parallax between the two screen images gives your eyes the same information that they would get from a real a three-dimensional scene. (Figure 2)

Figure 2
There are several types of devices that can be used to view 3D images. VR goggles include stand-alone type, PC-connected type, and smartphone drop-in type. A variety of different models is available according to price, ease of use, and the type of video that can be viewed (e.g. Spatial Video, 3D Theater, and 3D 180°). 3D images can also be viewed with a stereoscopic, naked-eye display.
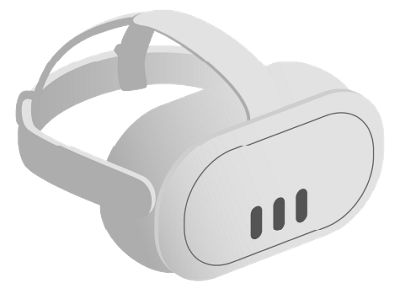
Stand-Alone Type
PC-Connected Type
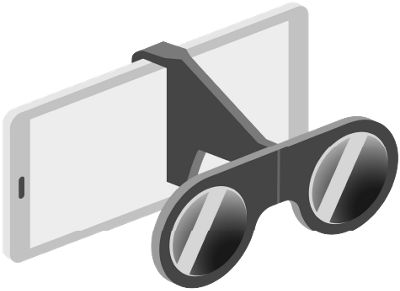
Smartphone Drop-In Type
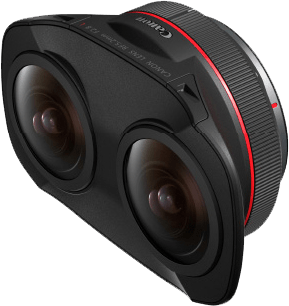
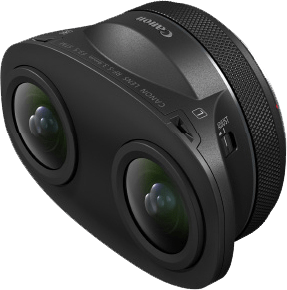
RF5.2mm F2.8 L DUAL FISHEYE
RF-S3.9mm F3.5 STM DUAL FISHEYE
RF-S7.8mm F4 STM DUAL
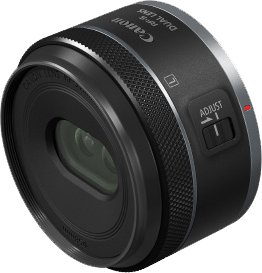
Image Type
RF5.2mm: 3D VR
RF-S3.9mm: 3D VR
RF-S7.8mm: 3D
User Insight
RF5.2mm: Want to Shoot High-Quality VR Videos
RF-S3.9mm: Want to Begin Taking Casual VR Videos
RF-S7.8mm: Want to Begin Taking Casual VR Videos
Subjects
RF5.2mm:
• Live Performances
• Architecture
• Indoor
• Parties
• Nature scenes
• Etc.
RF-S3.9mm:
• Travel
• Animals
• Weddings
• Portraits
• Vehicles
• Etc.
RF-S7.8mm:
• Cooking
• Makeup
• Miniature Models
• Small Items
• Etc.
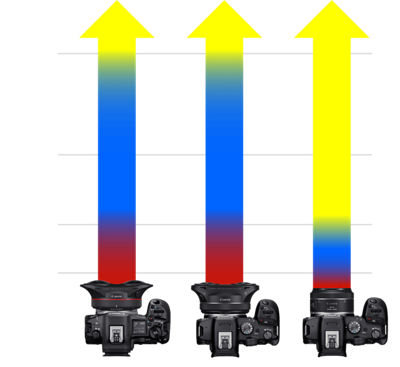
Recordable Angle of View
RF5.2mm: 190°
RF-S3.9mm: 144°
RF-S7.8mm: 63°
Range of Distances that Produce the Clearest 3D Effect
RF5.2mm: Approx. 50cm to 2m
RF-S3.9mm: Approx. 50cm to 2m
RF-S7.8mm: Approx. 15 to 50cm
Compatible Cameras
* As of October 2024
RF5.2mm:
EOS R5
EOS R5C
EOS R6 Mark II
EOS R5 Mark II
EOS C400
EOS C80
RF-S3.9mm: EOS R7
RF-S7.8mm: EOS R7
Focusing Mode
RF5.2mm: Manual Focus
RF-S3.9mm: One-Shot AF
RF-S7.8mm: Servo AF
Recommended Viewing Method (3D and 3D VR)
RF5.2mm: VR Goggles (3D 180°)
RF-S3.9mm: VR Goggles (3D 180°)
RF-S7.8mm:
VR Goggles (3D 180°, 3D SBS)
Smartphone VR Glasses
Naked-Eye 3D Display
The illustration below depicts the entire image that is captured by the lens (large circle), and the area that can be seen clearly when viewing the virtual reality images with VR goggles (within the red circle). The areas outside the red circle will only appear in your peripheral vision. Therefore, it is important to consider the area that will be clearly visible when setting up the composition of the shot, to ensure that the main subjects are front and center, and can be seen easily when viewed with VR goggles.
Also, because of the nature of the display, the recorded image is magnified for viewing purposes. This may allow the viewer to perceive noise and lack of resolution in the image, particularly when compared to the perceived resolution when viewing 2D images on a PC or phone. Therefore, it is best to set the resolution as high as possible when taking 3D virtual-reality shots.

The distance from the camera to the subject is also important. Each lens has a recommended distance to the subject, indicating the range that will produce the most vivid three-dimensional effect. Be sure to keep this distance in mind when setting up your shot. If the subject is too far away (compared to the recommended distance), the three-dimensional effect will be less pronounced. If the subject is too close, the 3D effect may be ruined entirely.

Difficult to generate a three-dimensional effect

Easier to generate a clear three-dimensional effect

Left and right images not properly aligned
When VR videos are viewed with VR goggles, the stability of the image is important. If the camera moves or shakes too much, viewing the images may cause symptoms of “VR sickness” - dizziness, nausea, and discomfort. To ensure that your 3D VR videos do not cause VR sickness, try to keep the camera stable with as little shaking as possible.
When shooting with a moving camera, it is best to move the camera in the same direction as the viewer's line of sight. Many of the camera techniques used when shooting 2D videos (such as pan, tilt, roll, etc.) involve horizontal movement or rotation of the camera. If employed when shooting 3D images, this type of movement is likely to induce VR sickness.
On the other hand, as long as the entire subject/scene that you want to capture fits inside the viewing area of the VR goggles, a 3D lens can be used in exactly the same way as a conventional 2D lens, with no restrictions.
Move the camera directly toward or away from the subject.

Using a Tripod
To obtain the most stable and blur-free images, use of a tripod is recommended.

Hand-Held Shooting
To minimize camera-shake blur when shooting subjects at close range with a hand-held camera, put the camera strap around your neck and use both hands, to give the camera three points of support.

Other Products that can Help Reduce Blurring
When shooting a video that follows a moving subject, it is best to use equipment such as gimbals or a slider to reduce camera-shake blur.

Shadow Reflection
When using a lens with a wide angle of view, there is a risk that the shadow of the photographer, camera or tripod may appear on the screen. To avoid this, carefully choose the shooting direction and composition depending on the position of the sun or other light sources.
When the light source is behind the photographer, their shadow may fall within the viewing range.

Camera Height
When watching videos with VR goggles, the viewer may get confused if the height of the camera suddenly changes, or if they lose their sense of where the camera is located. Therefore, it is recommended to take videos from a point as close to eye level as possible, or from a location where the ground is visible, so it is easy to judge the height of the subject.
Level
Image tilt is much more noticeable in 3D virtual reality images than in 2D images. Furthermore, since the image stabilization function relies on an algorithm that detects the tilt of the image, it cannot properly correct the tilt if the image is tilted from the beginning. It is best to use an electronic level in the camera or a commercially available level, to carefully position the camera before shooting.
Some models of VR lens are equipped with an AF function. If the lens you are using has the AF function, the AF point will appear on the left-eye side of the image on the monitor. To autofocus, just point at the desired point of focus and press the shutter release button halfway, to bring the camera into focus, as you do with normal 2D photos.
If the VR lens you are using has no AF function, focus should be adjusted manually. Since the image will appear smaller than when shooting normal videos, use the viewfinder’s magnification function to bring the image into focus. To achieve a more accurate focus, be sure to adjust the focus of both the left and right lenses individually.
As is the case when shooting conventional 2D video, 3D / 3D VR videos can record sound using either the camera’s built-in microphone or external microphones. For high-grade video productions, a stereoscopic sound system may be used.
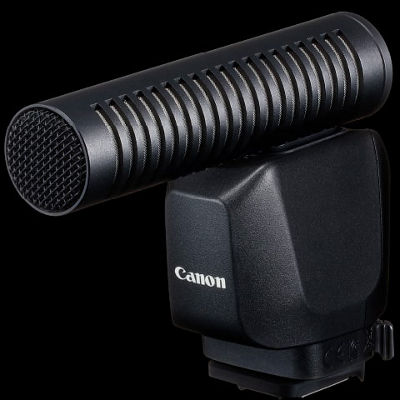
External Microphone
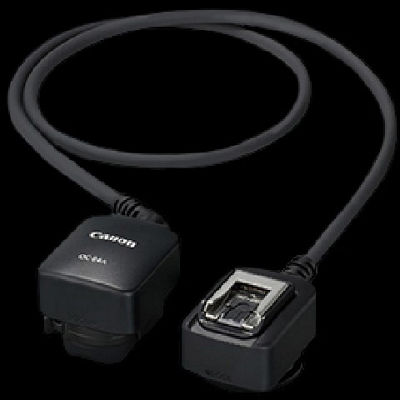
Off-Camera Shoe Cord
Notes on the use of external microphones
- RF5.2mm F2.8 L DUAL FISHEYE
Since the angle of view is 190°, this lens will capture the external microphone attached to a camera as shown in the picture. To avoid this problem, use an off-camera shoe cord or some other setup to keep the microphone away from the camera.
- RF-S3.9mm F3.5 STM DUAL FISHEYE / RF-S7.8mm F4 STM DUAL
A genuine Canon microphone can be attached for shooting 3D and 3D virtual reality images, without the risk of it being captured in the picture frame.
No lighting equipment has been developed exclusively for shooting VR images. In general, normal lighting equipment can be used. However, when shooting with wide-angle lenses such as the RF5.2mm F2.8 L DUAL FISHEYE or RF-S3.9mm F3.5 STM DUAL FISHEYE, it is important to check the position of all lighting equipment, to avoid capturing it in the picture.
Lighting equipment should be placed behind the camera. When lighting a subject close to the camera, be careful not to capture the camera’s shadow in the frame. If necessary, use a supplemental light source to help eliminate shadows, such as a ring light or multi-lighting device that can be placed at center of the camera.
Shadow created by the camera/photographer
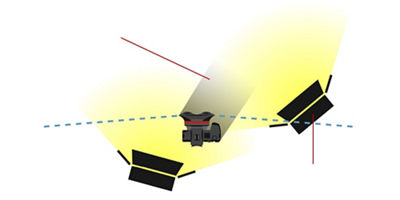
Lighting equipment partly captured in the image
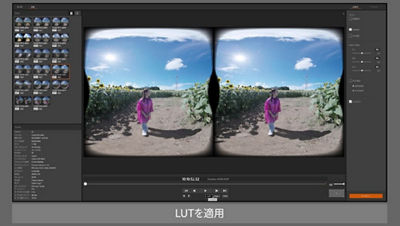
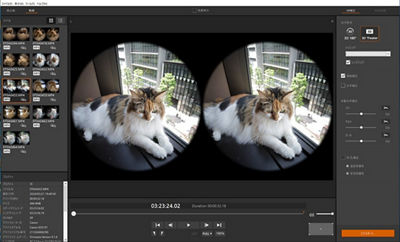
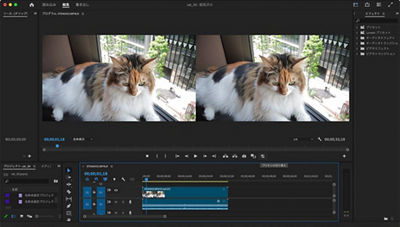
The EOS VR SYSTEM contains a standalone 3D / 3D VR conversion software called “EOS VR Utility”, as well as plug-in software for Adobe Premiere Pro. With these applications you can easily perform non-linear editing (NLE) of 3D / 3D VR footage, as easily as normal video editing. In addition, image data converted with the EOS VR Utility can be edited in Fusion mode of Davinci Resolve. However, the metadata must be set to match the output destination, using Adobe Media Encoder.
EOS VR Utility (some functions require a user fee)
The EOS VR Utility allows you to switch left and right fisheye images that were recorded in reverse due to the design of the lens. This utility can also convert images to the equirectangular cylindrical view (supporting both movies and still images), perform various lens corrections (parallax correction, horizontal correction), and perform playback and simple cut editing. It also supports image stabilization and look-up tables for Canon Log movies.
EOS VR Plugin for Adobe Premiere Pro (some functions require a user fee)
This software plug-in is used to convert virtual reality images to the VR180 format which is used by Adobe Premiere Pro (left-right image switching, equirectangular cylindrical view). Since the filmed data can be edited directly, full-scale VR video editing is easy. Parallax correction and horizontal correction are also supported.
For 3D VR footage recorded with the RF5.2mm F2.8 L DUAL FISHEYE or RF-S3.9mm F3.5 STM DUAL FISHEYE, a spacious cutaway is recommended so that the viewer can see the periphery of the image.
When the viewer’s line of sight changes or there is a cut to another scene, it is best to insert a brief black-screen cut, to help the viewer anticipate the transition to a new image.
There are several software applications that allow the user to add text to VR video. The following instructions will use Adobe Premiere Pro as an example.
1. Check the Settings of the VR180 Video Sequence
Make sure that the VR properties of the sequence settings are set to the following:
- Layout: Stereoscopic - parallel
- Horizontally captured view: 180°
- Vertically captured view: 180°

2. Insert Text Graphic
As you would do with conventional video, select the text tool and insert the text that you want to appear in the designated sequence.

3. Position the Text Graphic
Use the text graphic selection tool or transform tool to position the text in the center of the screen*.
* The center of the viewed image, not the center between the left and right images

4. Apply VR Effect
Apply the “Project image as VR plane” effect to this graphic, by selecting from the “video effects” menu and choosing “Immersive video”. Since the Auto VR property is turned on, the text will automatically be positioned properly in both the left and right frames of the picture.

5. Adjust Text Styles
- Adjust the size of the text by selecting from the “text effects” menu and choosing “Scale” (facing angle / degree). Adjust the font size and scale of the text as well since the text could become invisible at “180 degree” setting.
- “Rotate projection” lets you adjust the position of the text.
- “Rotate source” lets you adjust the orientation of the text.

6. Adjust Stereo Parallax
Adjust the “Stereo parallax” (degree) of the text effect by comparing it with the parallax of the VR180 image.

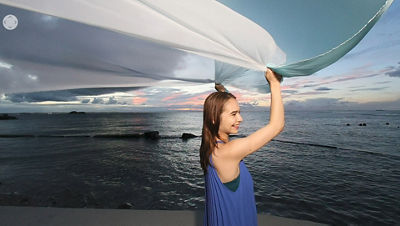
The best way to understand the attraction of 3D / 3D VR is to actually experience it. Get yourself a head-mounted display (HMD) or other 3D viewing environment, and check out these 3D clips?
RF5.2mm F2.8 L DUAL FISHEYE
RF-S3.9mm F3.5 STM DUAL FISHEYE
The world of 3D / 3D VR is evolving day by day. On this website, we have compiled the most up-to date information on 3D and virtual reality, and associated products.
Thanks for signing up!
The application has encountered an unknown error. Please try again in a few minutes!
By clicking Sign Up, you are opting to receive promotional, educational, e-commerce and product registration emails from Canon USA. You can update your preferences or unsubscribe at anytime.